DIY Vampire Fangs: Simple Steps to Make Your Own Scary Teeth

Halloween is just around the corner, and what better way to spook your friends and family than by wearing a pair of DIY vampire fangs? These iconic teeth are a staple of Halloween costumes and can add an extra level of scare to your outfit. While there are plenty of pre-made fangs available for purchase, making your own allows you to customize the size, shape, and color to your liking. Plus, crafting your own fangs can be a fun and creative activity for the whole family. Creating your own vampire fangs may seem daunting, but with a few simple steps, you can have a pair of scary teeth in no time. All you need is a few basic materials like dental wax, fake nails, and red food coloring, and you’re ready to get started. Whether you’re dressing up for a Halloween party, creating a spooky photo shoot, or just looking to scare your friends, making your own vampire fangs is a great way to add some extra creepiness to your costume. So let’s sink our teeth into this DIY project and get started!
Buying fake vampire fangs may seem like the easiest option, but why settle for something generic when you can make your own unique set of scary teeth? Not only does making your own fangs allow for personalization and creativity, but it also adds an extra level of authenticity to any costume or Halloween look. Plus, DIY fangs can be made with household items, such as dental wax or molding putty, making them an affordable and accessible option for anyone looking to add some spooky flair to their costume. So, skip the store-bought fangs and embrace your inner vampire by making your own set of terrifying teeth.
To create your own vampire fangs, you will need a few essential materials that can be easily found at any craft store or online. Firstly, you will need thermoplastic beads, which are small plastic pellets that can be melted and molded into any shape. You will also need a bowl of hot water to soften the beads and shape them into fangs. Additionally, you should have a pair of scissors, a toothpick or a small brush to apply the thermoplastic to your teeth, and a mirror to help you mold the fangs to fit your mouth. Finally, you may want to purchase some fake blood or red food coloring to add an extra creepy touch to your DIY vampire fangs. With these materials, you can transform into a terrifying vampire just in time for Halloween or any costume party!
Step 1: Mold the Fangs

The first step in making DIY vampire fangs is molding the fangs. This is a crucial step as it determines the shape and size of the fangs. To mold the fangs, you will need dental putty, which is readily available at any drugstore. Dental putty is a non-toxic, moldable material that is commonly used in dentistry. It is easy to work with and dries quickly, making it perfect for molding fangs. To begin, take a small amount of dental putty and mix it with your fingers until it becomes soft and pliable. Then, roll it into a ball and place it in your mouth over your canine teeth. Bite down gently and hold the putty in place for a few minutes until it hardens. Once the putty has hardened, remove it from your mouth and carefully trim any excess material using a pair of scissors. You should now have a mold of your canine teeth that you can use to make your fangs. Overall, molding the fangs is an essential part of the DIY vampire fang-making process. It requires a bit of patience and precision, but the end result is worth the effort. By following these simple steps, you’ll have your very own custom-made vampire fangs that are sure to scare your friends and family.
Creating a mold of your teeth is a crucial step in making your own DIY vampire fangs. Firstly, purchase a dental impression kit from your local drugstore or online. Next, mix the putty as per the instructions provided in the kit. Make sure that the putty is completely mixed and free of air bubbles. Quickly, press the putty into the impression tray provided and place the tray over your upper teeth, biting down firmly. Hold the tray in place for a few minutes before carefully removing it. Repeat the same process for the lower teeth. Once the putty has set, remove it from the tray and allow it to dry completely. Et voila! You now have a mold of your teeth, which can be used to create your own set of scary fangs.
To create your own DIY vampire fangs, you will need several materials for molding. First and foremost, you will require dental alginate, which is a mold-making material used by dentists. Dental alginate is safe to use in the mouth and will capture an accurate impression of your teeth. You will also need dental stone or plaster of Paris to create a cast of your teeth. Other materials include a mixing bowl, a spatula for mixing the alginate and plaster, and a container of Vaseline or petroleum jelly to protect your lips and gums during the molding process. With these materials in hand, you can create a custom set of vampire fangs that will fit comfortably and look terrifyingly realistic.
Getting the perfect mold for your DIY vampire fangs can make all the difference in achieving a realistic and scary look. Firstly, ensure that your teeth are clean and dry before starting the molding process. Next, use a high-quality dental alginate to create an accurate impression of your teeth. It is essential to mix the alginate correctly and place it in the tray quickly to ensure a flawless mold. After setting, remove the mold carefully, making sure not to distort the impression. Finally, use a dental stone to create the final mold for your fangs, and you’ll have a perfect set of teeth that will terrify anyone!
Step 2: Create the Fangs

Creating the fangs is the most crucial and exciting step in making your own DIY vampire fangs. The process involves molding the plastic material into the shape of fangs and securing them onto your teeth. There are several materials available in the market that you can use to create the fangs, including dental acrylic, thermoplastic beads, and synthetic resin. Dental acrylic is the most popular material as it is durable, easy to work with, and safe for use in the mouth. To create the fangs, you will need to mix the dental acrylic powder and liquid in a bowl and apply the mixture onto a mold. The mold can be made using your teeth as a template, or you can use a pre-made mold that is available in the market. Once the acrylic has set, you can remove the mold and trim the excess material to create the perfect fang shape. The final step is to attach the fangs onto your teeth using dental adhesive or denture adhesive. Creating the fangs requires patience and precision as it involves working with a delicate material in your mouth. It is essential to follow the instructions carefully and take the necessary safety precautions to avoid any mishaps. Once you have created the fangs, you can customize them to your liking by adding fake blood or using a tooth whitener to make them look more realistic. DIY vampire fangs are an excellent way to add an extra touch of horror to your Halloween costume, and they are also a fun activity to do with friends or family. With a little bit of creativity and effort, you can create your own custom fangs that will make you the envy of all your friends.
To create your own vampire fangs, you will need a mold. First, mix together the alginate and water according to the package instructions to make a mold. Then, place the mold in your mouth and bite down to create a mold of your teeth. Once the mold has set, remove it from your mouth and fill it with dental acrylic. Allow the acrylic to dry and harden before removing it from the mold. Finally, use a file to shape the acrylic into the desired fang shape and paint them with white or red acrylic paint to give them a realistic look. With these simple steps, you can create your own custom vampire fangs to complete your spooky Halloween costume.
To create DIY vampire fangs, you will need a few materials that are easily accessible. First, you will need dental wax, which can be found at any pharmacy or drugstore. This wax will serve as the foundation for your fangs and will allow you to mold the shape of your teeth. You will also need dental putty, which will be used to create the final mold for your fangs. Additionally, you will need a mixing bowl and a spoon to mix the putty. Lastly, you will need a pair of scissors to trim the wax and a file to smooth out any rough edges. With these materials, you will be able to make your very own custom vampire fangs that will be sure to scare your friends and family.
When it comes to shaping your DIY vampire fangs, there are a few tips to keep in mind. First, use a high-quality dental putty to create a mold of your teeth, making sure to press down firmly to capture every detail. Once you have your mold, use a sharp knife or scissors to cut out the shape of your fangs, being careful not to damage the mold. Next, use a fine-grit sandpaper to smooth out any rough edges and shape the fangs to your liking. Finally, if you want to add some extra realism, use a dark-colored food coloring or paint to add some stains or discoloration to the tips of the fangs. With these tips in mind, you’ll be able to create a pair of DIY vampire fangs that are both scary and realistic.
Step 3: Paint the Fangs

The third and crucial step in creating your DIY vampire fangs is to paint them. This step is essential in bringing your fangs to life and making them look as realistic as possible. The paint will give your fangs a glossy, glistening look that will make them stand out and look terrifying. You can use a variety of colors depending on your preference and the look you want to achieve. Black or red paint can give your fangs a more sinister appearance, while white paint can make them look more natural. You can also add some glitter or shimmer to your paint to create a more glamorous effect. Before painting your fangs, make sure they are clean and dry to ensure the paint adheres properly. When painting your fangs, it’s important to take your time and be precise. Use a small brush to apply the paint, and start with a thin layer first. You can always add more paint if needed, but it’s harder to remove it once it’s on. Allow each layer to dry completely before adding another. It’s best to apply two to three coats of paint for a more polished look. Once you’ve finished painting your fangs, let them dry completely before putting them in your mouth. It’s important to note that the paint is non-toxic and safe for oral use, but you should still avoid swallowing it. With the final step completed, you now have a pair of scary vampire fangs that are sure to frighten all your friends and family on Halloween night!
To paint the fangs, you will need a few materials to ensure that they look as realistic and scary as possible. Firstly, make sure you have a good quality set of acrylic paints in white and black, as well as a fine-tipped paintbrush for detail work. You will also need a small container of water to thin the paints as needed. For added depth and dimension, consider getting a set of vampire teeth shading powders in shades of brown and gray. Finally, to protect your finished fangs, you’ll need a clear coat spray paint or gloss varnish. With these materials, you’ll be well-equipped to create a set of fangs that will strike fear into the hearts of anyone who sees them.
When it comes to getting the perfect shade for your DIY vampire fangs, there are a few tips and tricks to keep in mind. First, consider the overall look you’re going for. Are you aiming for a classic vampire look with stark white teeth, or something more modern with a slightly yellowed or stained appearance? Once you’ve determined the desired shade, choose a high-quality dental acrylic that will hold its color over time. Make sure to mix the acrylic thoroughly and apply it evenly to your fangs, using a toothbrush or small brush to coat every surface. Finally, consider adding a bit of shading or texture to your fangs with a fine paintbrush and some food coloring or acrylic paint. With a little bit of patience and attention to detail, you can create a set of DIY vampire fangs that look frighteningly realistic!
Step 4: Attach the Fangs
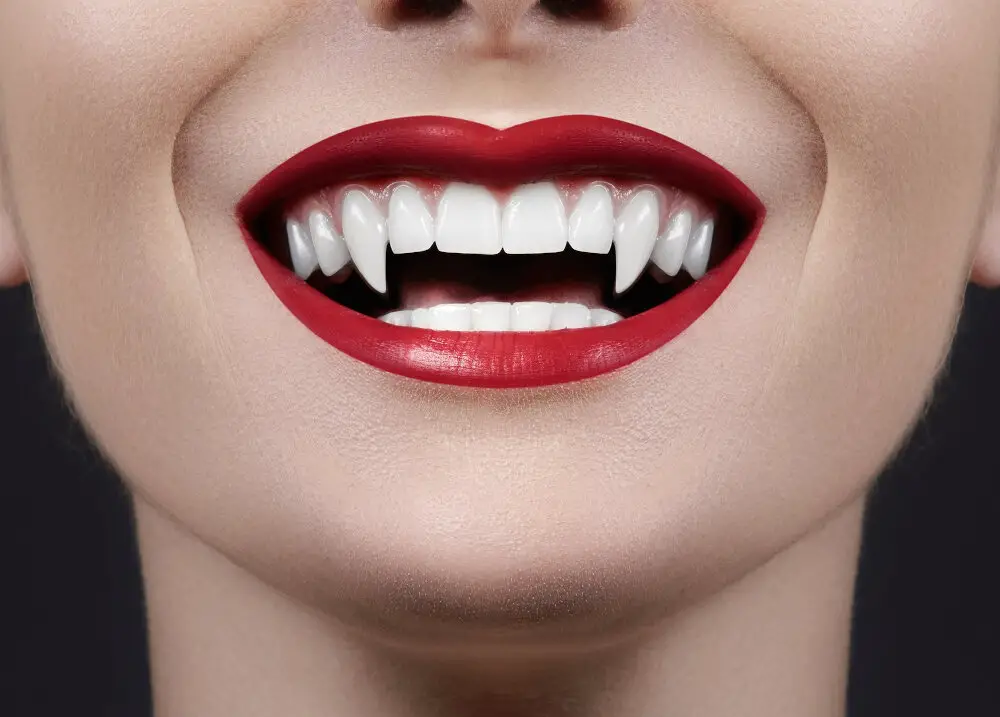
Once you have completed the previous steps of the DIY vampire fangs, it’s now time to attach the fangs to your teeth. This is the most crucial part of the process, as you want to ensure that the fangs stay in place while you wear them. The easiest way to attach the fangs is to use dental wax, which can be found in most drugstores. Dental wax is a safe and non-toxic material that can be molded to fit your teeth. Simply heat up a small amount of wax in your hands and mold it around the base of the fang. Then, press the fang onto your tooth and hold it in place for a few seconds until the wax hardens. Repeat this process for the other fang, and you’re ready to scare your friends!It’s important to note that dental wax is not a permanent solution, and the fangs may come loose after a few hours of wear. If you’re looking for a more long-lasting option, you can use dental adhesive instead. Dental adhesive is a stronger material that can hold the fangs in place for up to 24 hours. To use dental adhesive, simply apply a small amount to the base of the fang and press it onto your tooth. Hold it in place for a few seconds until the adhesive sets. However, it’s important to use dental adhesive sparingly, as using too much can cause discomfort or even damage to your teeth.
Attaching fangs to your teeth may seem daunting, but with a little patience and the right materials, it’s a simple process. First, clean your teeth thoroughly and dry them completely. Then, apply a small amount of dental wax or putty to the back of each fang and press firmly onto your canine teeth, holding them in place for a few seconds. For added security, you can also use dental adhesive or denture cream. Once the fangs are securely in place, adjust them to your desired angle and trim any excess material with scissors. With your new DIY vampire fangs, you’ll be ready to scare and impress your friends this Halloween!
To attach your DIY vampire fangs, you will need a few key materials. Firstly, dental wax or putty is essential for molding the fangs to fit your teeth. You can find this material at most drugstores or online. Next, you will need a small amount of superglue or denture adhesive to secure the fangs in place. It’s important to use only a tiny amount of adhesive, as too much can be harmful to your teeth and gums. Lastly, make sure you have a mirror and a steady hand to ensure that the fangs are properly aligned and positioned for a realistic look. With these materials in hand, you’ll be ready to transform into a terrifying vampire in no time!
When it comes to securing your DIY vampire fangs, there are a few key tips to keep in mind. First and foremost, make sure that the adhesive you use is safe for use in the mouth – many types of glue can be toxic if ingested. Dental wax or denture adhesive are both good options. Additionally, be sure to clean and dry your teeth thoroughly before applying the fangs, as any moisture or debris can interfere with the adhesive’s effectiveness. Finally, take care when placing the fangs on your teeth – if they are not aligned properly, they can cause discomfort or even damage to your teeth. With these tips in mind, you can enjoy a truly frightening vampire look that’s sure to impress.
In summary, creating your own vampire fangs is a straightforward process that involves a few simple steps. First, gather the necessary materials such as dental wax and thermoplastic beads. Next, mold the wax onto your teeth and shape it into the desired fang shape. Once the wax is set, melt the thermoplastic beads in hot water and mold them around the wax fangs. After the plastic has hardened, remove the fangs and trim them to your desired length. Finally, attach the fangs to your teeth using denture adhesive. With a little bit of patience and creativity, you can have your own set of scary vampire fangs in no time.
In conclusion, there are a few final tips to make your DIY vampire fangs look even scarier. Firstly, consider adding some fake blood around the edges of the fangs to create a more realistic and gruesome effect. Secondly, if you have the time and patience, try filing the tips of the fangs to make them sharper and more pointed. Additionally, you can also paint the fangs with a layer of white nail polish or white paint to give them a more polished and professional appearance. Lastly, don’t forget to practice your best vampire impression and show off your scary teeth to everyone around you. With these tips, you’re sure to have the most terrifying fangs around!
Conclusion
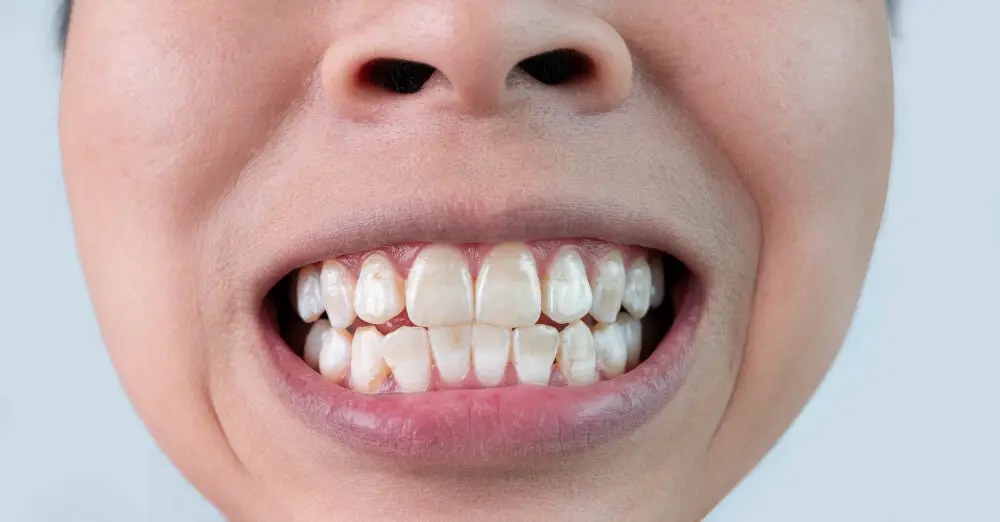
In conclusion, creating your own DIY vampire fangs is a fun and easy process that can add a spooky touch to any costume or Halloween party. With just a few simple materials and some patience, you can transform your teeth into a frightening set of fangs that will leave everyone in awe. Whether you’re a fan of vampire lore or just looking for a unique way to stand out, making your own scary teeth is a great way to get creative and embrace your inner monster. So grab some dental wax, acrylic paint, and a little bit of imagination, and start crafting your own set of DIY vampire fangs today!
